📘 Backend/Spring
비밀번호 찾기 & 재설정 구현(Google SMTP & Redis)
신건우
2024. 6. 3. 22:44
비밀번호 찾기 & 재설정 기능 구현(Google SMTP)
사내 비밀번호 찾기/초기화 기능을 위해 Email 인증을 자체 SMTP 서버를 만들어서 하려다가, 귀찮아서 Google SMTP를 이용하기로 했습니다.
우선 Google 계정 설정에 들어가서 아래 2개의 작업을 해줍니다.
- Multi Factor Authentication(2FA) 활성화
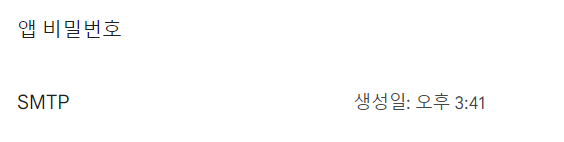
- App Password 생성
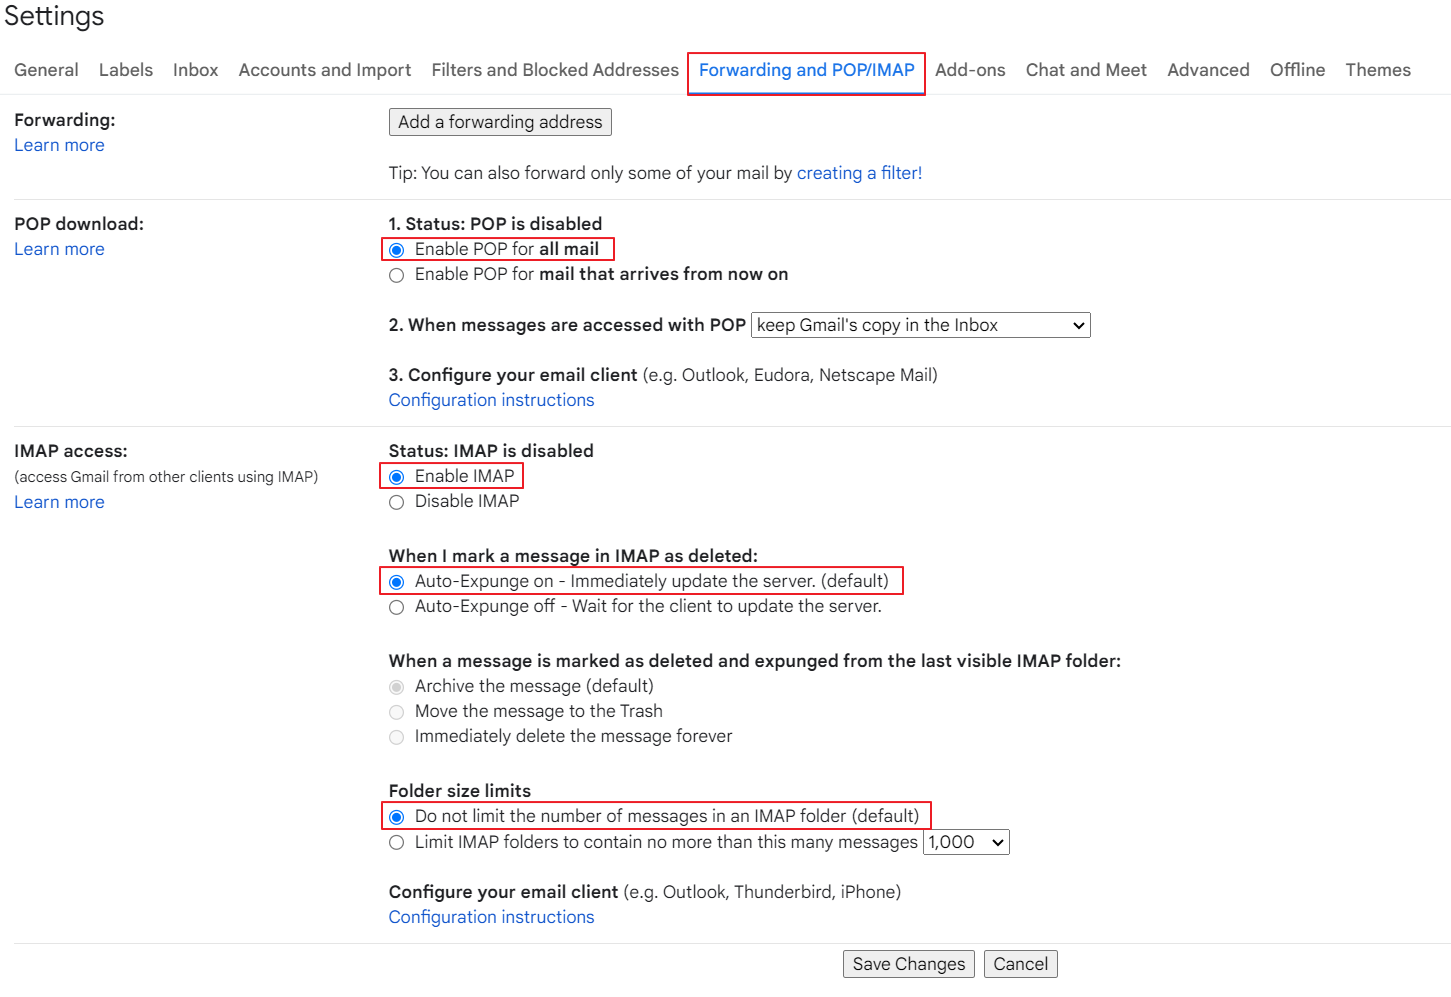
그리고 Gmail 탭으로 들어가 Mail 설정의 Forwarding and POP/IMAP 탭에 들어가서 아래와 같이 설정합니다.
Spring Boot Server 설정
build.gradle 파일에 Mail 추가
implementation 'org.springframework.boot:spring-boot-starter-mail'
application.yml 파일에 메일 설정
spring:
  mail:
    host: smtp.gmail.com
    port: 587
    username: dainsdevteam
    password: abcd
    properties:
      mail.smtp.debug: true
      mail.smtp.connection timeout: 1000 #1초
      mail.starttls.enable: true
      mail.smtp.auth: true
Mail Config 작성
@Configuration
@RequiredArgsConstructor
public class MailConfig {
    private static final String MAIL_SMTP_AUTH = "mail.smtp.auth";
    private static final String MAIL_DEBUG = "mail.stmp.debug";
    private static final String MAIL_CONNECTION_TIMEOUT = "mail.smtp.connectiontimeout";
    private static final String MAIL_SMTP_STARTTLS_ENABLE = "mail.smtp.starttls.enable";

    // SMTP 서버
    @Value("${spring.mail.host}")
    private String host;

    // 계정
    @Value("${spring.mail.username}")
    private String username;

    // 비밀번호
    @Value("${spring.mail.password}")
    private String password;

    // 포트번호
    @Value("${spring.mail.port}")
    private int port;

    @Value("${spring.mail.properties.mail.smtp.auth}")
    private boolean auth;

    @Value("${spring.mail.properties.mail.smtp.debug}")
    private boolean debug;

    @Value("${spring.mail.properties.mail.smtp.connectiontimeout}")
    private int connectionTimeout;

    @Value("${spring.mail.properties.mail.starttls.enable}")
    private boolean startTlsEnable;

    @Bean
    public JavaMailSender mailSender() {
        // Sender 정보 추가
        JavaMailSenderImpl javaMailSender = new JavaMailSenderImpl();
        javaMailSender.setHost(host);
        javaMailSender.setUsername(username);
        javaMailSender.setPassword(password);
        javaMailSender.setPort(port);

        // Mail Properties 추가
        Properties properties = javaMailSender.getJavaMailProperties();
        properties.put(MAIL_SMTP_AUTH, auth);
        properties.put(MAIL_DEBUG, debug);
        properties.put(MAIL_CONNECTION_TIMEOUT, connectionTimeout);
        properties.put(MAIL_SMTP_STARTTLS_ENABLE, startTlsEnable);

        javaMailSender.setJavaMailProperties(properties);
        javaMailSender.setDefaultEncoding("UTF-8");

        return javaMailSender;
    }
}
Mail Service로 테스트 이메일 보내보기
@Slf4j
@Service
@Scheduled
@Transactional(readOnly = true)
@RequiredArgsConstructor
public class MailService {
    private final JavaMailSender mailSender;

    public void sendEmail(String receiver, String title, String text) {
        SimpleMailMessage message = new SimpleMailMessage();
        message.setTo(receiver);
        message.setSubject(DateUtil.getDate() + " " + title);
        message.setText(text);

        try {
            mailSender.send(message);
        } catch (RuntimeException e) {
            log.warn("Failed to Send Email - {}", receiver);
            throw new CommonException(CommonExceptionCode.SERVER_ERROR);
        }
    }

    @Scheduled(fixedRate = 5000)
    public void emailScheduler() {
        sendEmail("tensorflow555@gmail.com", "테스트 이메일", "ㅇㅇㅇ");
    }
}
랜덤 인증번호 생성 & 인증번호 검증 함수 구현
- 인증번호를 생성할 때 Redis Hash를 생성해 code, expiration Key/Value를 넣고 Expire를 120초로 설정해줍니다.
- 인증번호 검증 성공 시, 즉시 Redis Hash를 제거합니다.
- Redis Hash 제거 후, 비밀번호 초기화 및 재설정 API에서 사용할 Redis Key를 1개 만들어 "ok"를 저장해줍니다.
@Slf4j
@Service
@Transactional(readOnly = true)
@RequiredArgsConstructor
public class MailService {
    private final AdmUserRepository admUserRepository;
    private static final String TITLE = "비밀번호 재설정 인증번호";
    private final JavaMailSender mailSender;
    private final JwtProvider jwtProvider;
    private final RedisTemplate<String, Object> redisTemplate;

    // Send Mail
    public void sendEmail(String receiver) {
        SimpleMailMessage message = new SimpleMailMessage();
        String to = receiver;
        String code = this.generateAuthCode();

        message.setTo(to);
        message.setSubject(TITLE);
        message.setText(code);

        // Redis에 인증코드 + 수신자 저장, 120초로 만료시간 설정
        redisTemplate.opsForHash().put(receiver, "code", code);
        redisTemplate.opsForHash().put(receiver, "expiration", DateUtil.getTime());
        redisTemplate.expire(receiver, 120, TimeUnit.SECONDS);

        try {
            mailSender.send(message);
        } catch (RuntimeException e) {
            log.warn("Failed to Send Email - {}", receiver);
            throw new CommonException(CommonExceptionCode.SERVER_ERROR);
        }
    }

    // 4자리 인증번호 생성
    public String generateAuthCode() {
        try {
            Random random = SecureRandom.getInstanceStrong();
            StringBuilder codeBuilder = new StringBuilder();

            for (int i = 0; i < 4; i++) {
                codeBuilder.append(random.nextInt(10));
            }

            return codeBuilder.toString();
        } catch (Exception e) {
            log.warn("Failed to generate auth code - {}", e.getMessage());
            throw new CommonException(CommonExceptionCode.SERVER_ERROR);
        }
    }

    // 인증코드 검증
    public boolean verifyAuthCode(String email, String authCode) {
        try {
            Optional<AdmUser> optUser = admUserRepository.searchUserByEmail(email);

            AdmUser user = null;
            if (optUser.isPresent()) user = optUser.get();
            else throw new CommonException(CommonExceptionCode.NOT_EXIST_USER);

            String key = user.getEmail();
            String now = DateUtil.getTime();
            String redisCode = (String) redisTemplate.opsForHash().get(user.getEmail(), "code");
            String expiration = (String) redisTemplate.opsForHash().get(user.getEmail(), "expiration");

            // 현재 시간과 만료 시간의 차이를 milli second로 반환
            long checkExpirationTime = DateUtil.getSecondsDifference(now, expiration);

            // 만료시간 120초로 설정
            if (checkExpirationTime < 120 && redisCode.equals(authCode)) {
                // 인증 성공 시, Redis Hash 삭제
                redisTemplate.opsForHash().delete(key, "code");
                redisTemplate.opsForHash().delete(key, "time");

                // 비밀번호 재설정 API 에서 사용할 Redis Key 추가(OK 사인)
                redisTemplate.opsForValue().set(user.getEmail(), "ok");

                return true;
            } else {
                redisTemplate.opsForHash().delete(key, "code");
                redisTemplate.opsForHash().delete(key, "time");

                return false;
            }
        } catch (Exception e) {
            e.printStackTrace();
        }

        return false;
    }
}
컨트롤러 작성
@PreAuth(componentId = 4, authorization = AuthorizationType.Create)
@PostMapping("/generate/code")
public ResponseEntity requestAuthCode(CustomHttpServletRequest request, @RequestParam("email") String email) {
    mailService.sendEmail(email);
    return new ResponseEntity(ApiResponseDto.makeSuccessResponse(), HttpStatus.OK);
}

@PreAuth(componentId = 4, authorization = AuthorizationType.Read)
@GetMapping("/verify/code")
public ResponseEntity verifyAuthCode(CustomHttpServletRequest request, @RequestParam("email") String email, @RequestParam("code") String code) {
    return new ResponseEntity(ApiResponseDto.makeResponse(mailService.verifyAuthCode(email, code)), HttpStatus.OK);
}
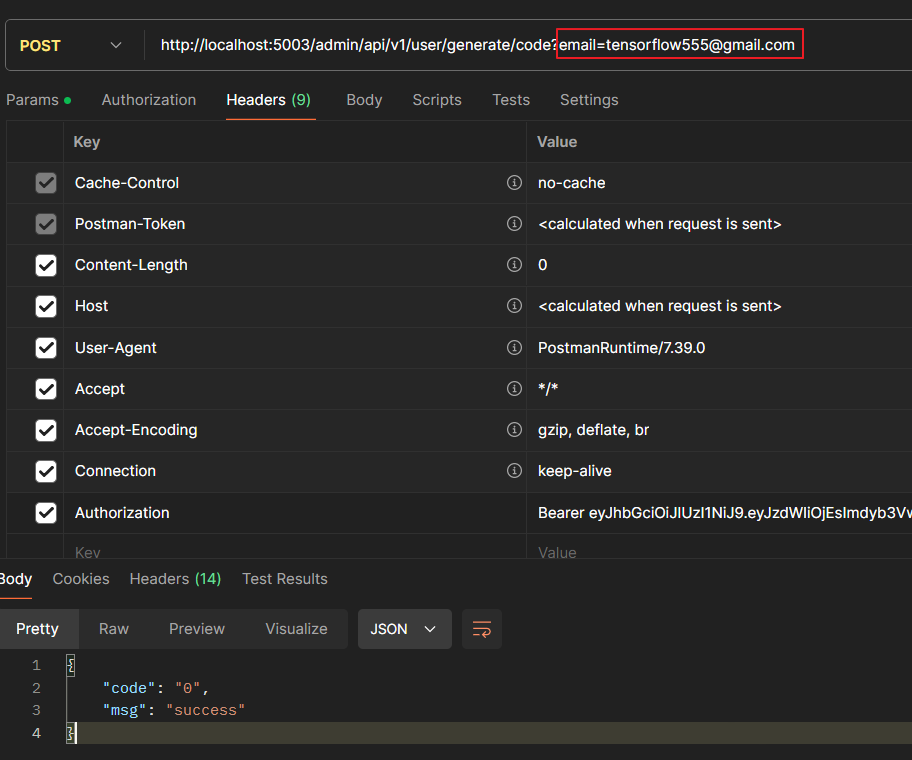
인증번호 생성 & 검증하기
PostMan으로 요청을 보내 인증번호를 받습니다.
이메일 확인

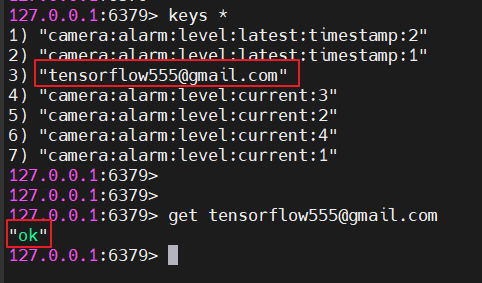
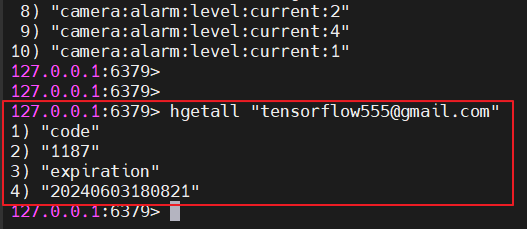
Redis Hash를 보면 코드와 만료시간이 들어가 있습니다.
인증번호 검증 API를 호출해보면 120초 이내에 요청하고, 검증이 성공해 true 반환

이후 비밀번호 재설정 및 초기화 로직은 인증코드 검증 시 마지막에 추가한 Redis Key를 이용해,
비밀번호를 새로 넣어주고 사용한 Redis Key는 제거 해주었고, 다시 로그인을 하니 비밀번호가 잘 바뀐걸 확인할 수 있습니다.
@Transactional
public void generateNewPassword(final Integer userId, final String password) {
    AdmUser user = admUserRepositoryInf.findAdmUserByUserId(userId);

    if (user != null) {
        String sign = (String) redisTemplate.opsForValue().get(user.getEmail());

        if ("ok".equals(sign)) {
            BCryptPasswordEncoder encoder = new BCryptPasswordEncoder();
            String newPassword = encoder.encode(password);

            user.changeAdminPassword(newPassword);
            admUserRepositoryInf.save(user);
            redisTemplate.delete(user.getEmail());
        } else {
            throw new CommonException(CommonExceptionCode.ACCESS_DENIED);
        }
    } else {
        throw new CommonException(CommonExceptionCode.NOT_EXIST_USER);
    }
}