
Custom Dialog를 이용한 Validation
사용자에게 입력값을 Form으로 받아 배열에 추가 후 출력하는것 까지 했었습니다.
그런데 이 입력폼은 공백을 제출해도 추가가 되게 되어 있기 때문에 입력값에 대한 검증을 해야 합니다.
이때 이용할 방법으로는 저번에 배웠던 Dialog를 이용한 검증을 수행하는겁니다.
AddResource.vue
그럼 입력폼을 받는 컴포넌트인 AddResource에 검증 함수를 만들어야겠죠.
아직 Dialog 컴포넌트를 만들지 않았으니 if 조건문만 추가해줍니다.
submitData() {
  const enteredTitle = this.$refs.titleInput.value;
  const enteredDesc = this.$refs.descInput.value;
  const enteredLink = this.$refs.linkInput.value;

  if (enteredTitle.trim() === '' || enteredDesc.trim() === '' || enteredLink.trim() === '') {

    return;
  }

  this.addResource(enteredTitle, enteredDesc, enteredLink);
}
BaseDialog.vue
잘못된 값이 들어올 시 Dialog를 출력하는 컴포넌트
<template>
  <div></div>
  <dialog open>
    <header>
      <slot name="header">
        <h2>{{ title }}</h2>
      </slot>
    </header>

    <!-- Dialog의 주 컨텐츠 -->
    <section>
      <slot></slot>
    </section>

    <!-- 사용자가 클릭할 버튼 표시 -->
    <menu>
      <slot name="actions"></slot>
    </menu>
  </dialog>
</template>

<script>
export default {
  props: {
    title: {
      type: String,
      required: false
    }
  },
}
</script>

<style scoped>
div {
  position: fixed;
  top: 0;
  left: 0;
  height: 100vh;
  width: 100%;
  background-color: rgba(0, 0, 0, 0.75);
  z-index: 10;
}

dialog {
  position: fixed;
  top: 20vh;
  left: 10%;
  width: 80%;
  z-index: 100;
  border-radius: 12px;
  border: none;
  box-shadow: 0 2px 8px rgba(0, 0, 0, 0.26);
  padding: 0;
  margin: 0;
  overflow: hidden;
}

header {
  background-color: #3a0061;
  color: white;
  width: 100%;
  padding: 1rem;
}

header h2 {
  margin: 0;
}

section {
  padding: 1rem;
}

menu {
  padding: 1rem;
  display: flex;
  justify-content: flex-end;
  margin: 0;
}

@media (min-width: 768px) {
  dialog {
    left: calc(50% - 20rem);
    width: 40rem;
  }
}
</style>
main.js
그리고 이 Dialog도 전역적으로 사용할테니 main.js에 컴포넌트를 추가해줍니다.
import { createApp } from 'vue';

import App from './App.vue';
import BaseCard from './components/UI/BaseCard.vue';
import BaseButton from "@/components/UI/BaseButton";
import BaseDialog from "@/components/UI/BaseDialog";

const app = createApp(App)

app.component('base-card', BaseCard);
app.component('base-button', BaseButton);
app.component('base-dialog', BaseDialog);

app.mount('#app');
AddResource.vue
이제 다시 AddResource로 돌아와서 Dialog를 적용해보죠.
데이터 프로퍼티인 inputIsInvalid를 만들어서 조건문에 넣어주고, inputIsInvalid를 dialog 태그에 if 조건으로 붙여줍니다.
그리고 에러창이 떴으니 닫는 버튼도 있어야하니 2번쨰 슬롯인 action slot에 확인 버튼을 생성하고,
confirmError 함수를 만들어서 데이터 프로퍼티를 바꿔줍니다.
<!-- Dialog 에는 2개의 슬롯이 있으니 Custom한 템플릿을 작성해줍니다. -->
<base-dialog v-if="inputIsInvalid" title="Invalid Input">
  <template v-slot:default>
    <p>하나 이상의 입력값이 잘못 되었습니다.</p>
    <p>최소 1글자 이상 입력 해주세요.</p>
  </template>
  <!-- 버튼 슬롯 -->
  <template #actions>
    <base-button @click="confirmError">확인</base-button>
  </template>
</base-dialog>

...

data() {
  return {
    // 처음은 사용자가 아무 입력이 없으니 false를 Default로 설정
    inputIsInvalid: false
  };
},

methods: {
  submitData() {
    const enteredTitle = this.$refs.titleInput.value;
    const enteredDesc = this.$refs.descInput.value;
    const enteredLink = this.$refs.linkInput.value;

    // 입력값 중 하나가 비어 있으면 inputIsInvalid를 true로 설정
    if (enteredTitle.trim() === '' || enteredDesc.trim() === '' || enteredLink.trim() === '') {
      this.inputIsInvalid = true;
      return;
    }

    this.addResource(enteredTitle, enteredDesc, enteredLink);
  },

  // 에러 창을 닫을 수 있는 함수
  confirmError() {
    this.inputIsInvalid = false;
  },
},
에러 창 구현 완료
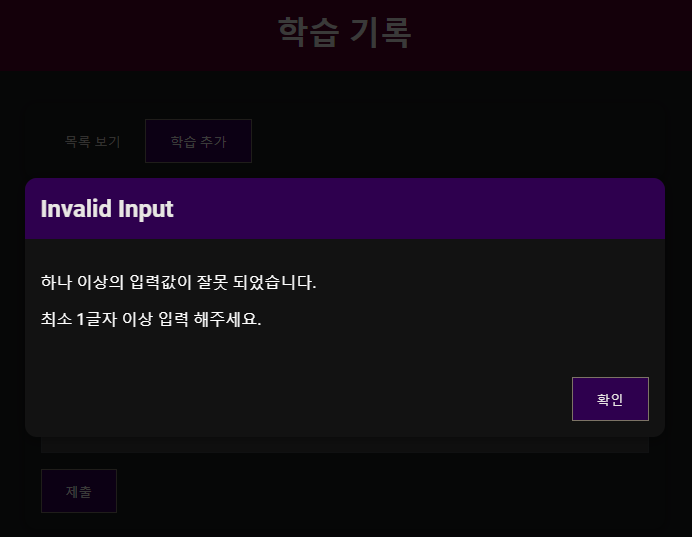
BaseDialog.vue
그런데 여기서 문제가 있습니다. 에러창이 뜨고 확인 버튼을 제외한 다른 곳을 누를때도 에러 창을 닫고 싶습니다.
...

<!-- 사용자가 클릭할 버튼 표시 -->
<menu>
  <slot name="actions">
    <base-button @click="$emit('close')">닫기</base-button>
  </slot>
</menu>

...

export default {
  props: {
    title: {
      type: String,
      required: false
    }
  },

  emits: ['close']
}
AddResource.vue
그리고 다시 AddResource로 돌아와서 Dialog를 사용한 태그에 close 이벤트를 수신해서 error가 발생했을때 트리거 되도록 해줍니다.
<base-dialog v-if="inputIsInvalid" title="Invalid Input" @close="confirmError">이제 확인 버튼이 아니라 에러 창 밖을 클릭해도 에러 창이 닫아지는걸 확인했습니다.
'📘 Frontend > Vue' 카테고리의 다른 글
| Vue - Native Fetch API를 이용한 HTTP Request 전송 (feat.Firebase) (0) | 2023.08.07 |
|---|---|
| Vue - 학습 기록 앱 만들기 끝 : 항목 삭제 & Teleport 기능 구현 (2) | 2023.08.06 |
| Vue - 학습 기록 앱 만들기 5 : Input Form 구현 (0) | 2023.08.05 |
| Vue - 학습 기록 앱 만들기 4 : 탭 간 전환 구현 (0) | 2023.08.05 |
| Vue - 학습 기록 앱 만들기 3 : Base Button Component (0) | 2023.08.05 |